Last Updated:2025-12-22
Building a website used to be hard. You had to deal with FTP, databases, and confusing code. Thankfully, Hostinger has changed the game.
With their modern hPanel, you can install WordPress and have a live website running in less than 5 minutes. You don’t need to be a tech wizard—you just need to know which buttons to click.
In this guide, I will walk you through the entire process, step-by-step.
Step 0: Get Your Hosting Plan (Don’t skip this)
Before we start, you need a hosting account. If you haven’t signed up yet, Hostinger is currently offering a 75% discountfor new users.
👉 Use this link to qualify for the free domain
Once you have your account ready, log in to the dashboard and follow along.

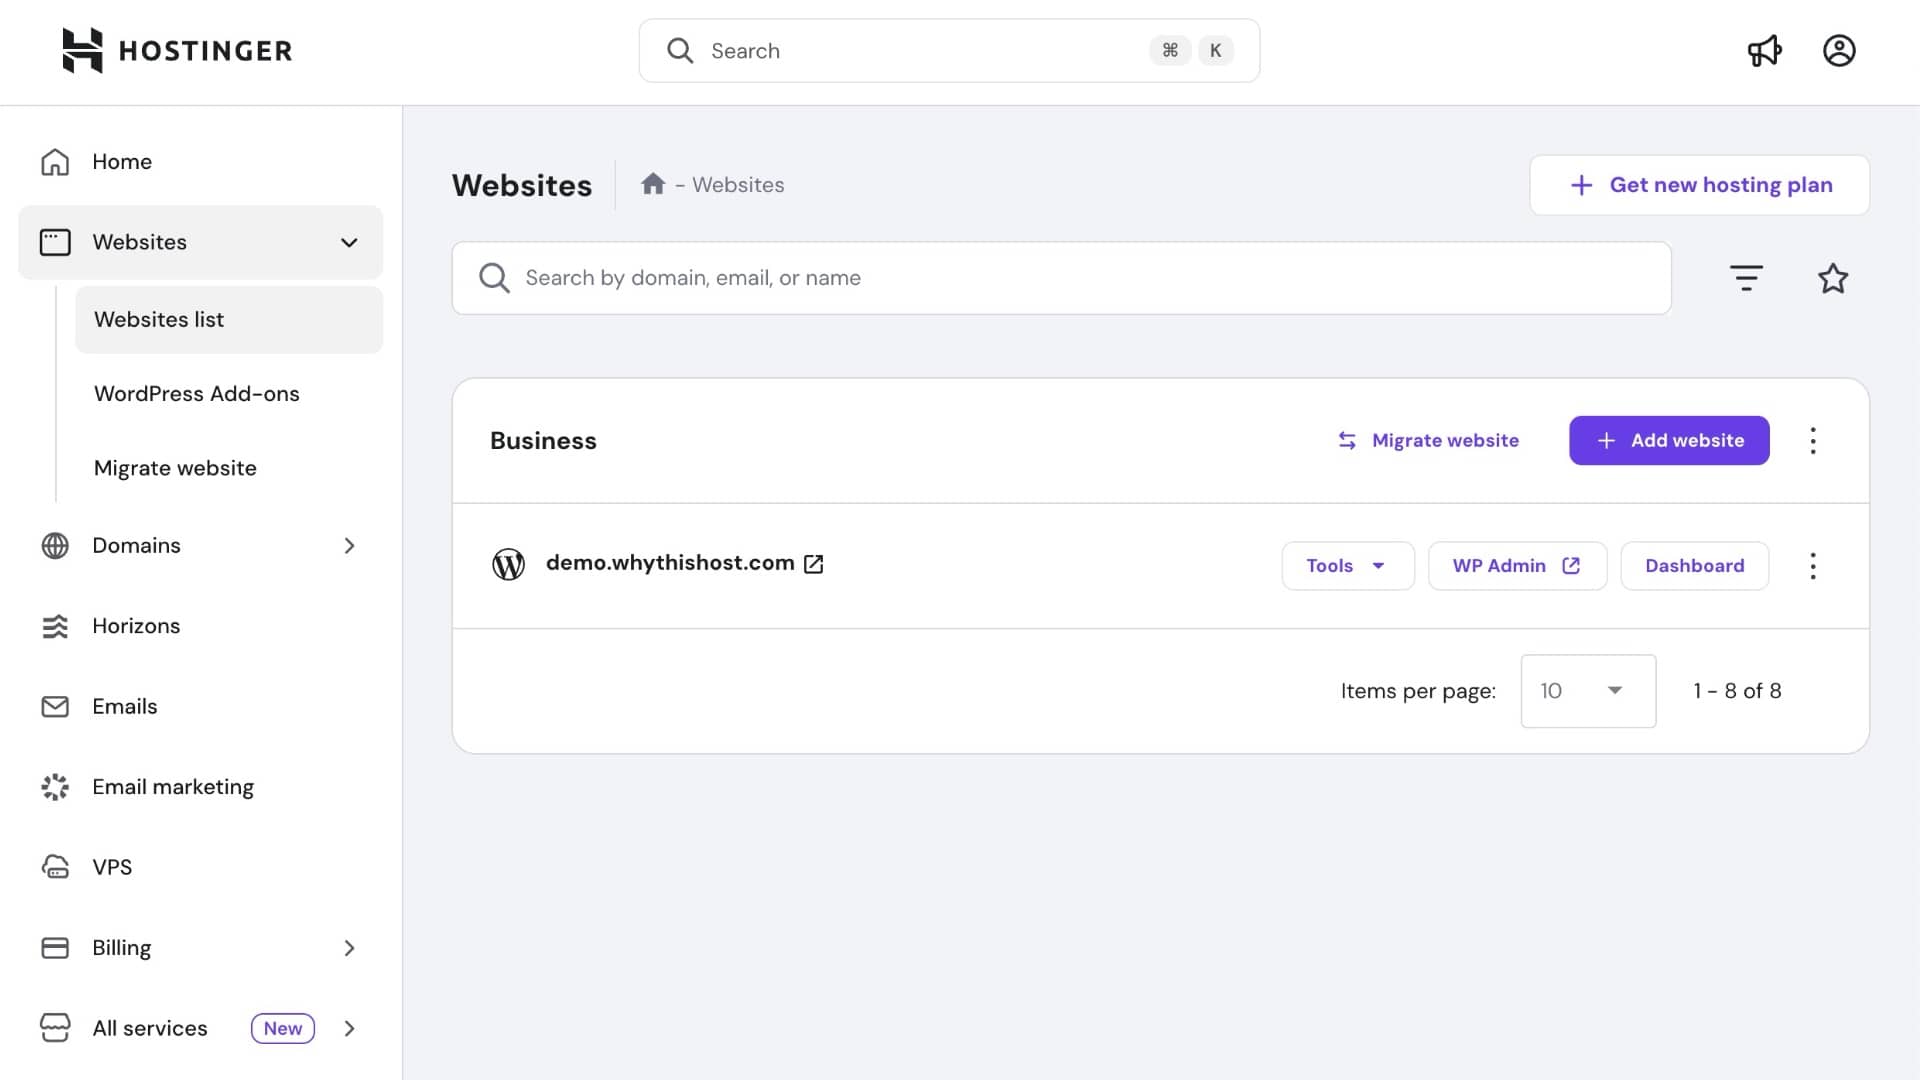
Step 1: Add New Website & Select WordPress
-
Log in to your Hostinger hPanel.
-
Click on the “Websites” tab in the top navigation bar.
-
Click the purple “+ Add website” button.
-
When asked what type of website you want to build, select “WordPress”.
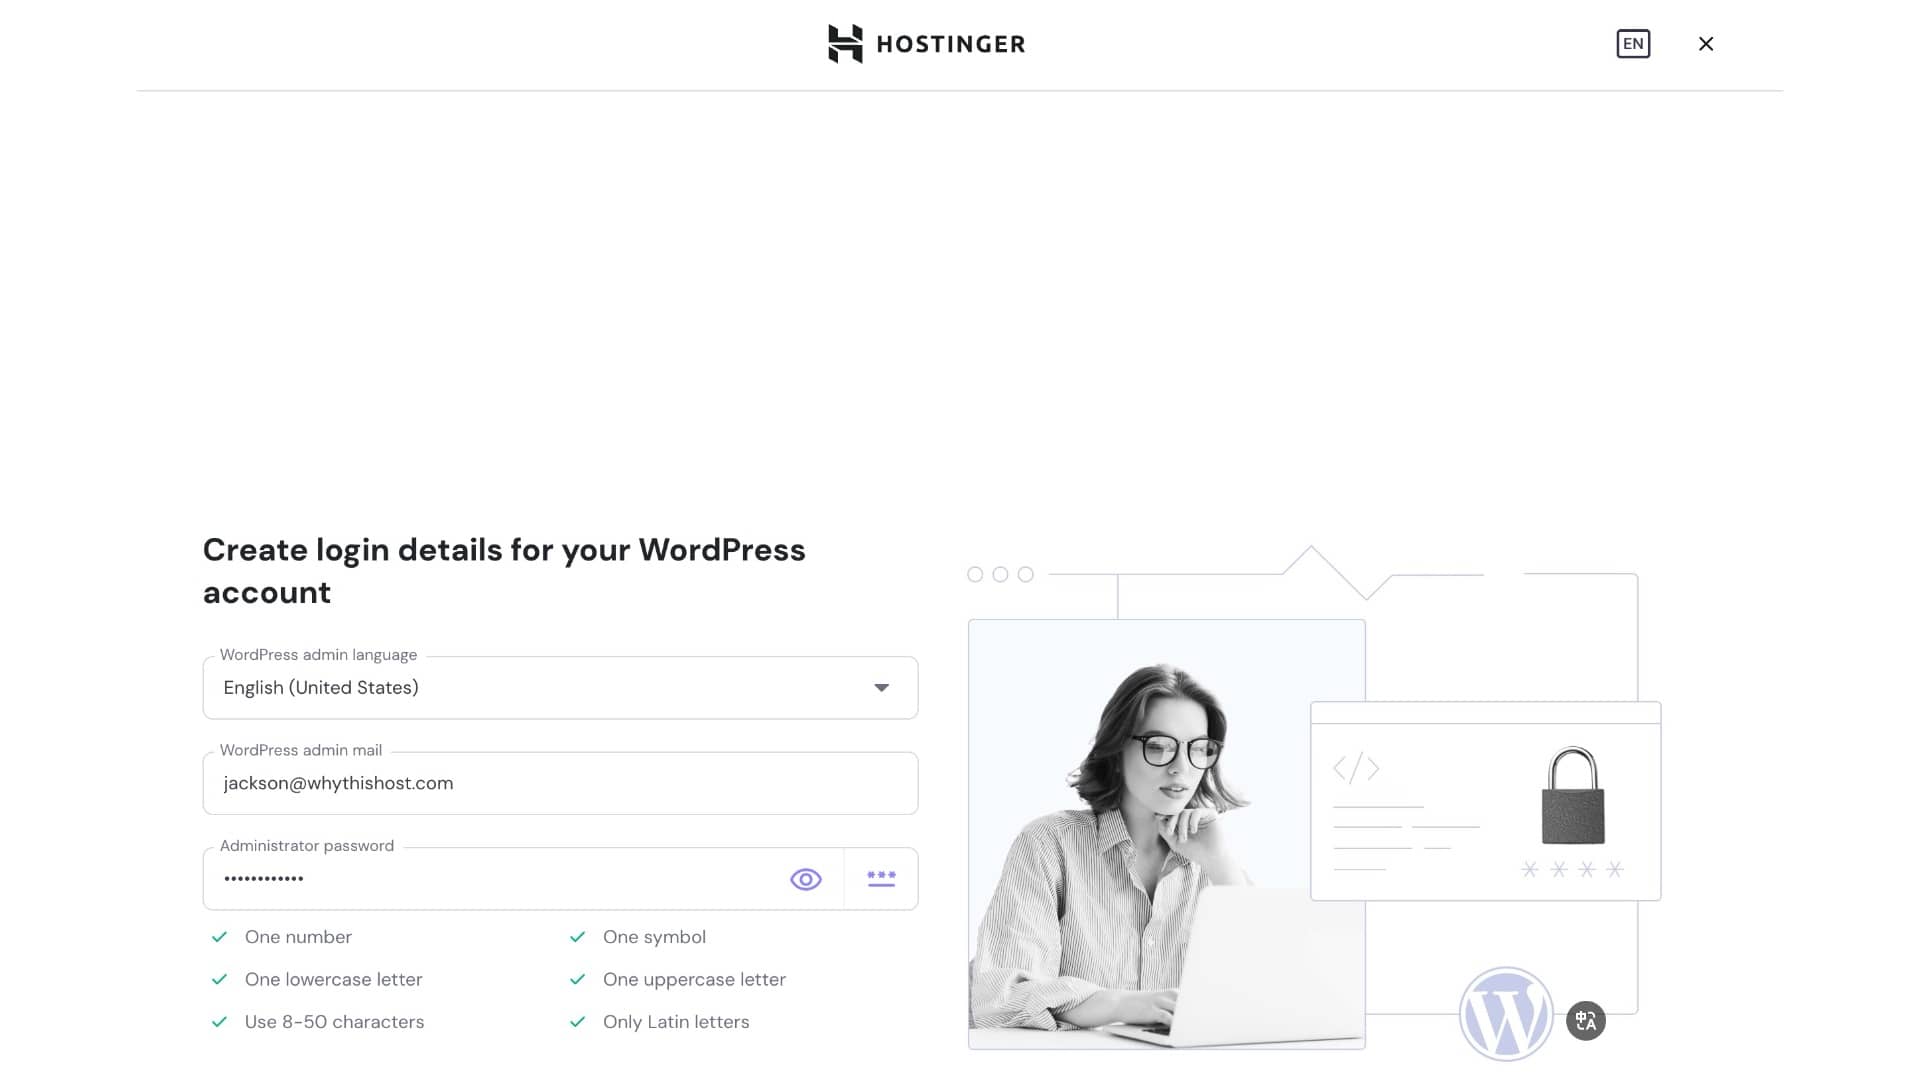
Step 2: Create Your WordPress Login
You will see a screen titled “Create login details for your WordPress account”.
Fill in the following:
-
WordPress admin language: Choose your language (e.g., English).
-
Administrator email: Your main email.
-
Administrator password: Create a strong password.
💡 Pro Tip: This password allows you to log in directly via yourdomain.com/wp-admin. Don’t worry if you forget it: You can always auto-login to your dashboard securely through the Hostinger hPanel without needing this password.
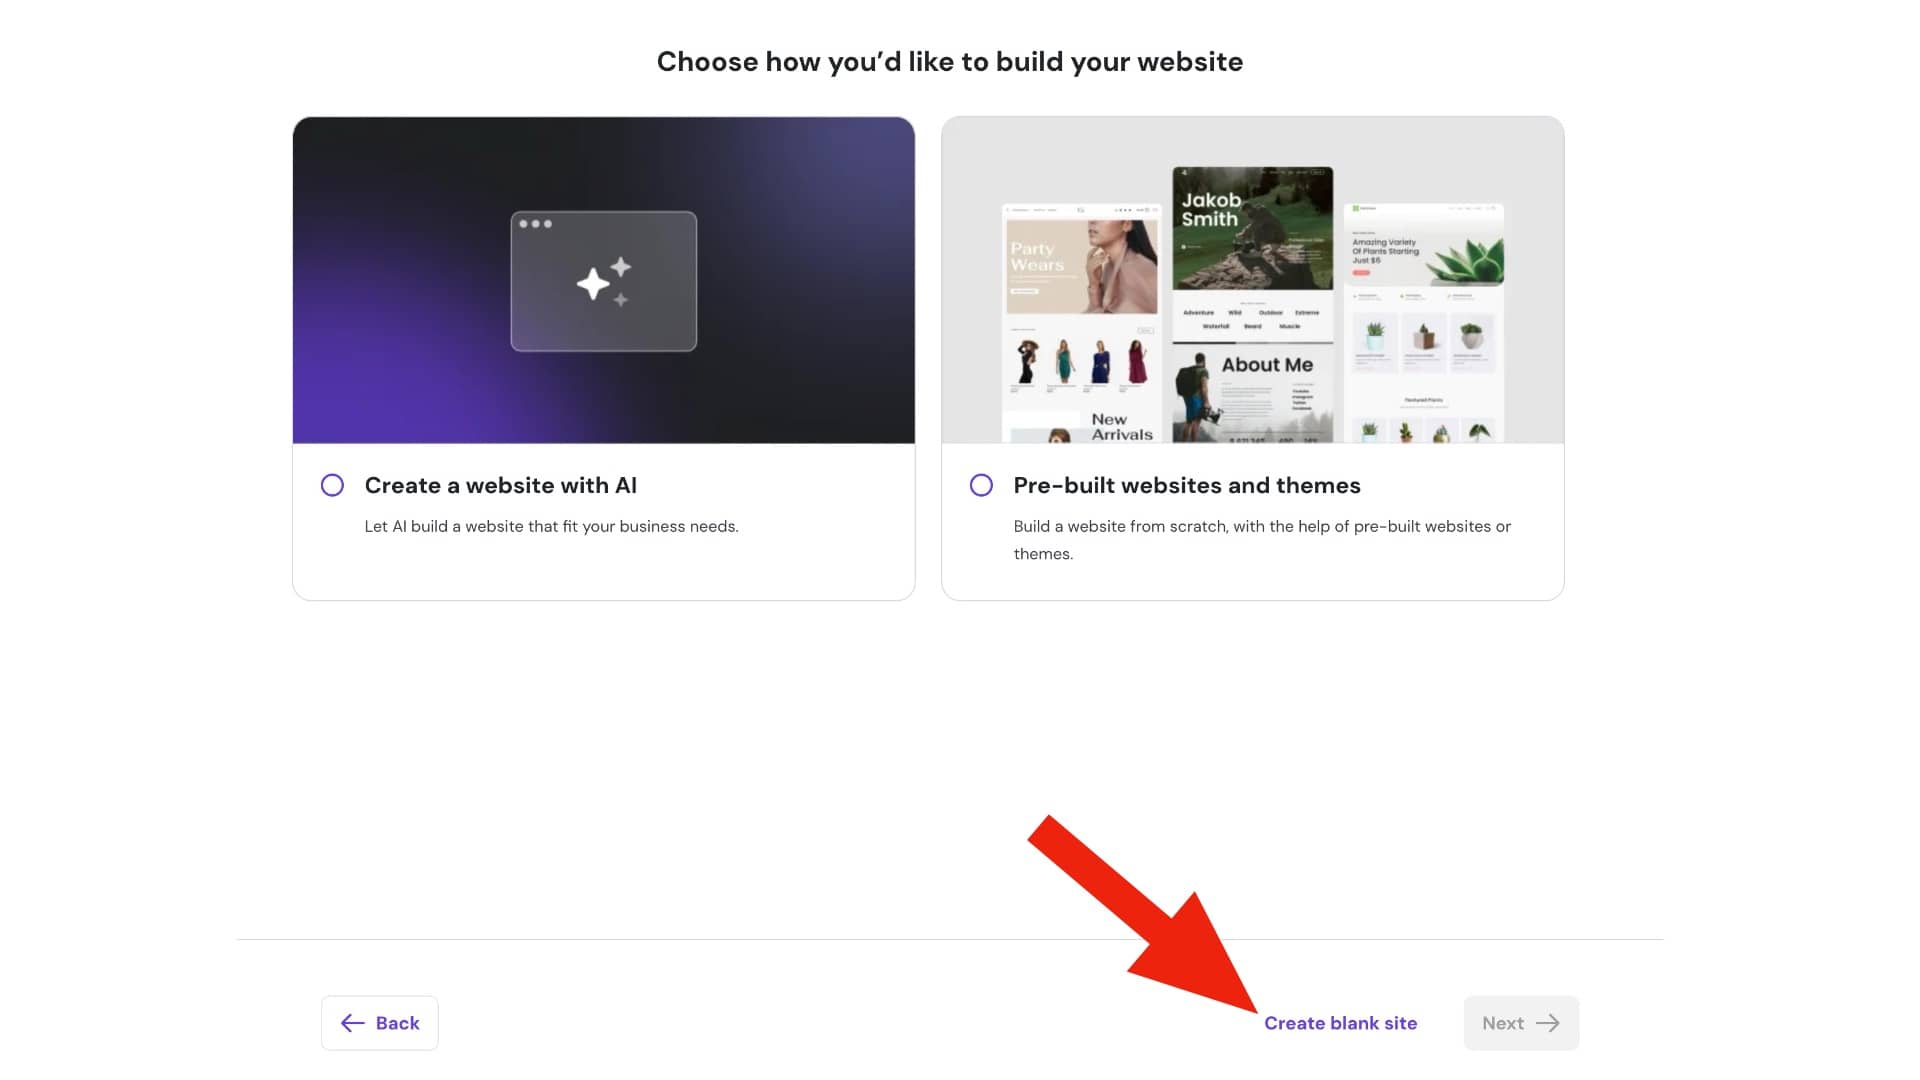
Step 3: Choose “Create Blank Site” (Recommended)
Hostinger might ask if you want to use AI or a pre-built template.
-
For Beginners & Pros: I strongly recommend ignoring the AI/Template options for now.
-
Action: Look for the small link at the bottom or side that says “Create blank site” (or “Skip, create an empty website”).
Why? Starting with a blank slate is cleaner. It prevents Hostinger from installing heavy plugins or themes you don’t need. You can always add themes later.
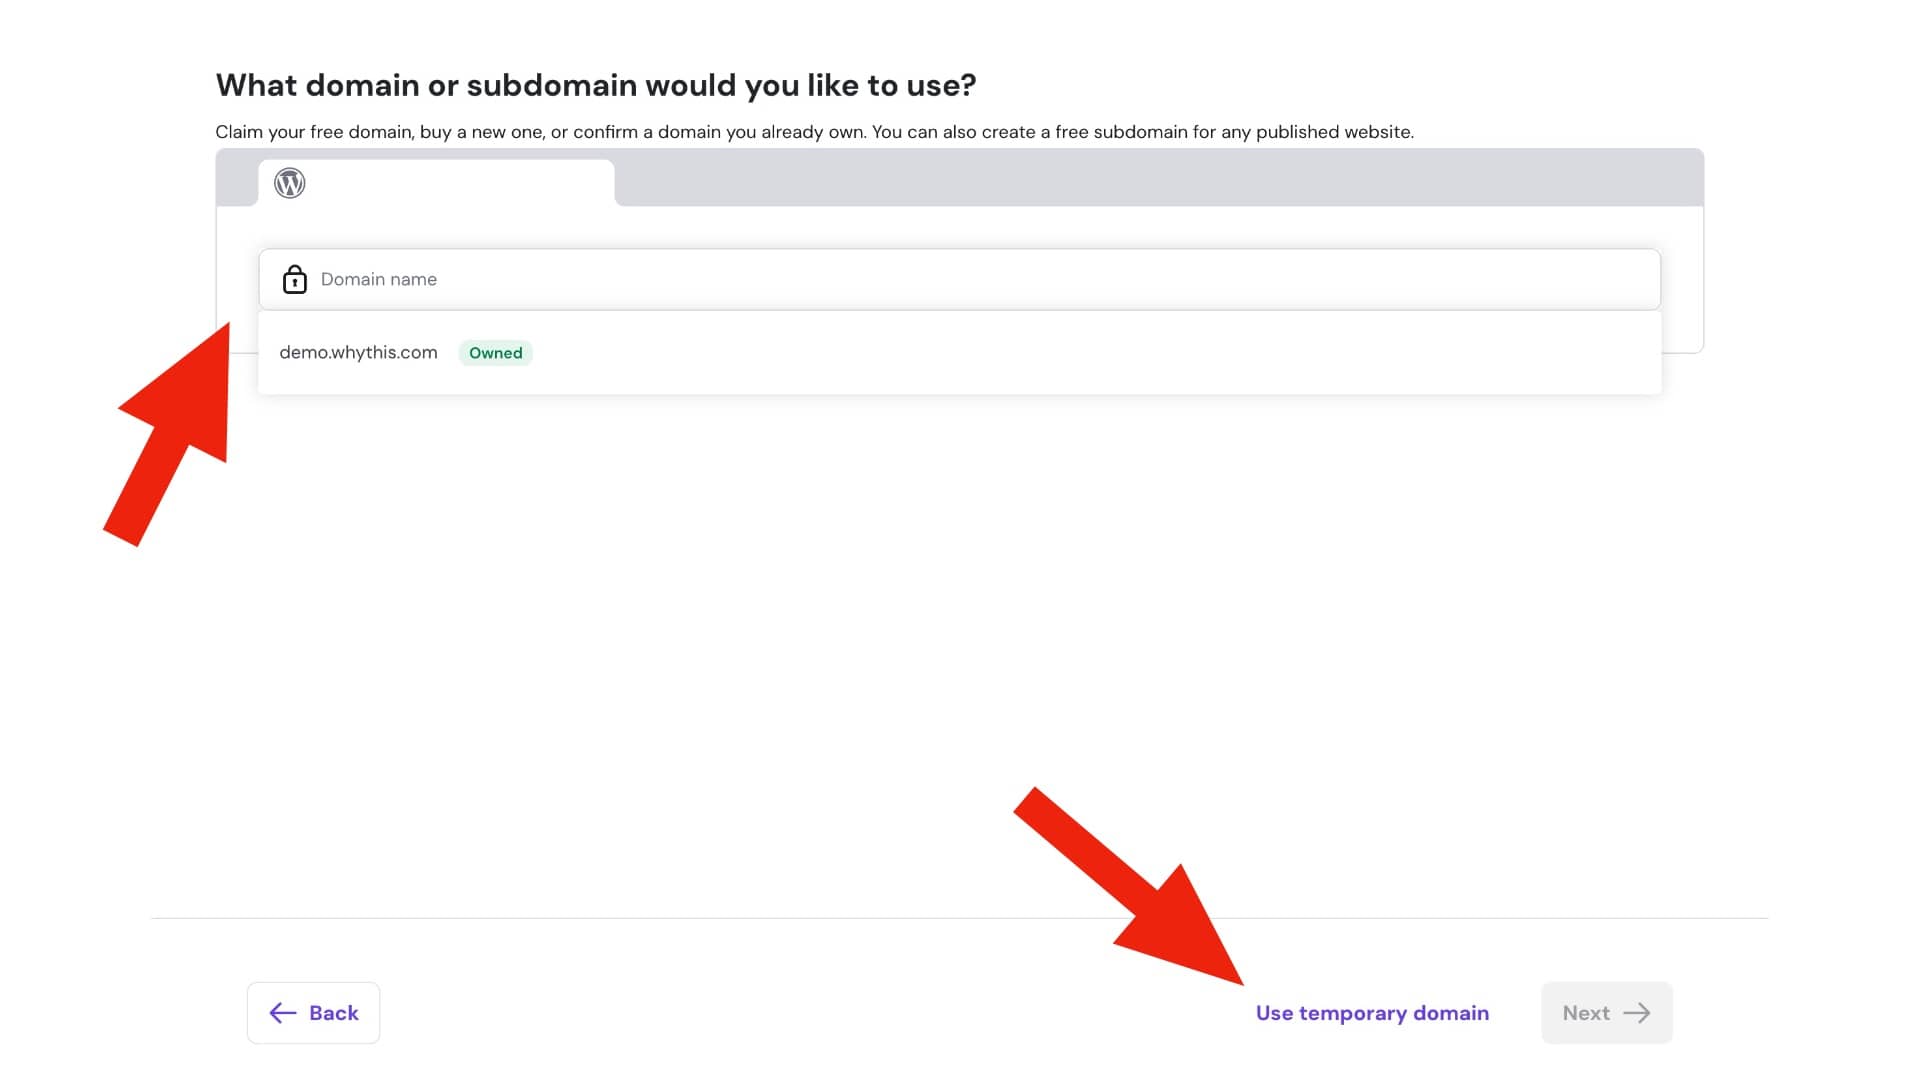
Step 4: Select a Domain (Or Use a Temporary One)
Now, Hostinger asks: “What domain or subdomain would you like to use?”.
You have three options:
-
Select from list: Use a domain you already bought.
-
Buy a domain: Buy a new one now.
-
Use a Temporary Domain (Recommended for Testing):
-
Look for the option “Use temporary domain” on the right or bottom of the screen.
-
This generates a free link (like
user123.preview-domain.com). -
Why do this? If you haven’t decided on a name yet, or your real domain is pointing elsewhere, you can start building now on a temp domain and connect your real domain later with one click.
-

Step 5: Let Hostinger Install
You will see a loading screen with a purple progress bar saying “Installing WordPress”.
Relax! This usually takes about 30 to 60 seconds. Hostinger is automatically setting up your database, installing core files, and configuring your SSL certificate.

Step 6: Access Your Dashboard
Once finished, you will be redirected to the Websites Dashboard.
To start editing your site, you have two ways to log in:
-
Via Hostinger (Easiest): In the hPanel dashboard, simply click the purple “Admin Panel” or “WP Admin”button. This logs you in automatically without a password.
-
Direct Login: Go to
yourdomain.com/wp-adminand enter the password you created in Step 3.
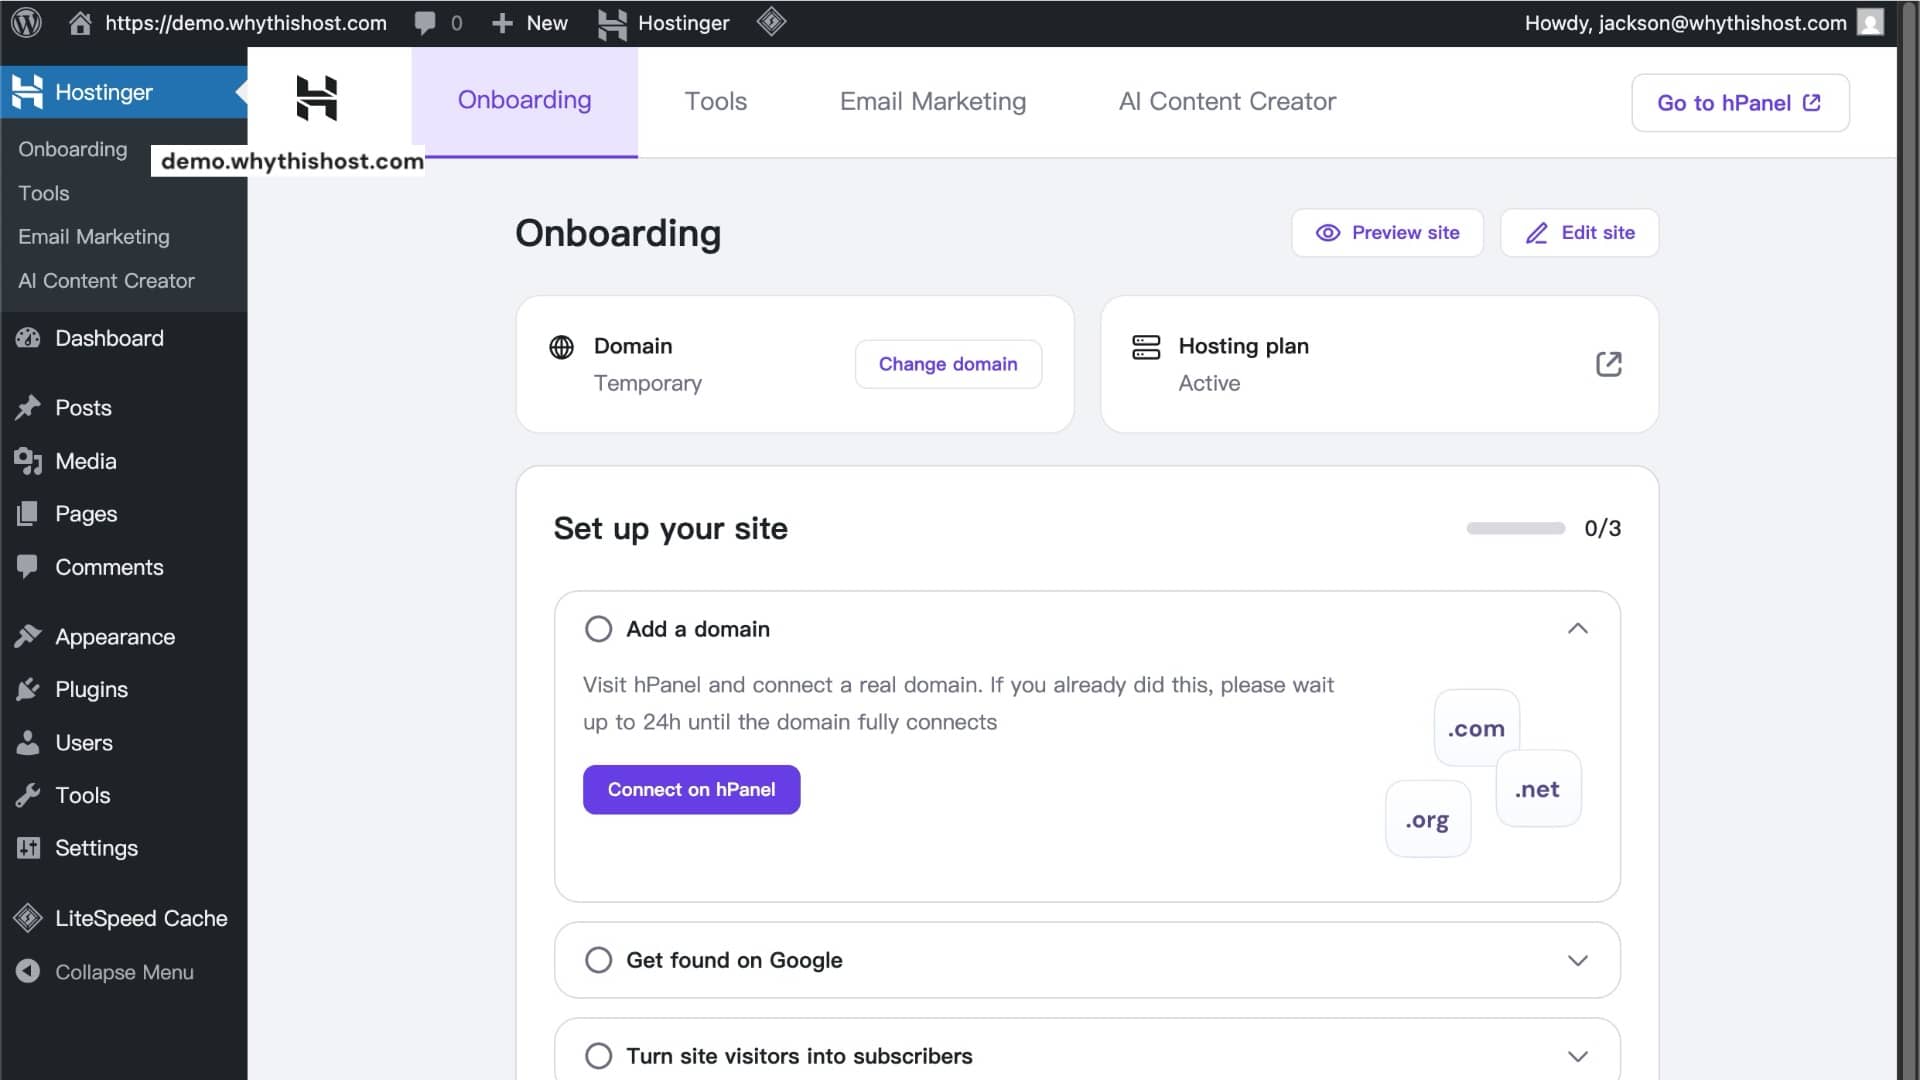
Congratulations! Your WordPress site is live.
 30-Day Money-Back Guarantee